The Crafty Gleim
Beginner snow globe kit
Beginner snow globe kit
Couldn't load pickup availability
These kits are designed for the beginner snow globe crafter.
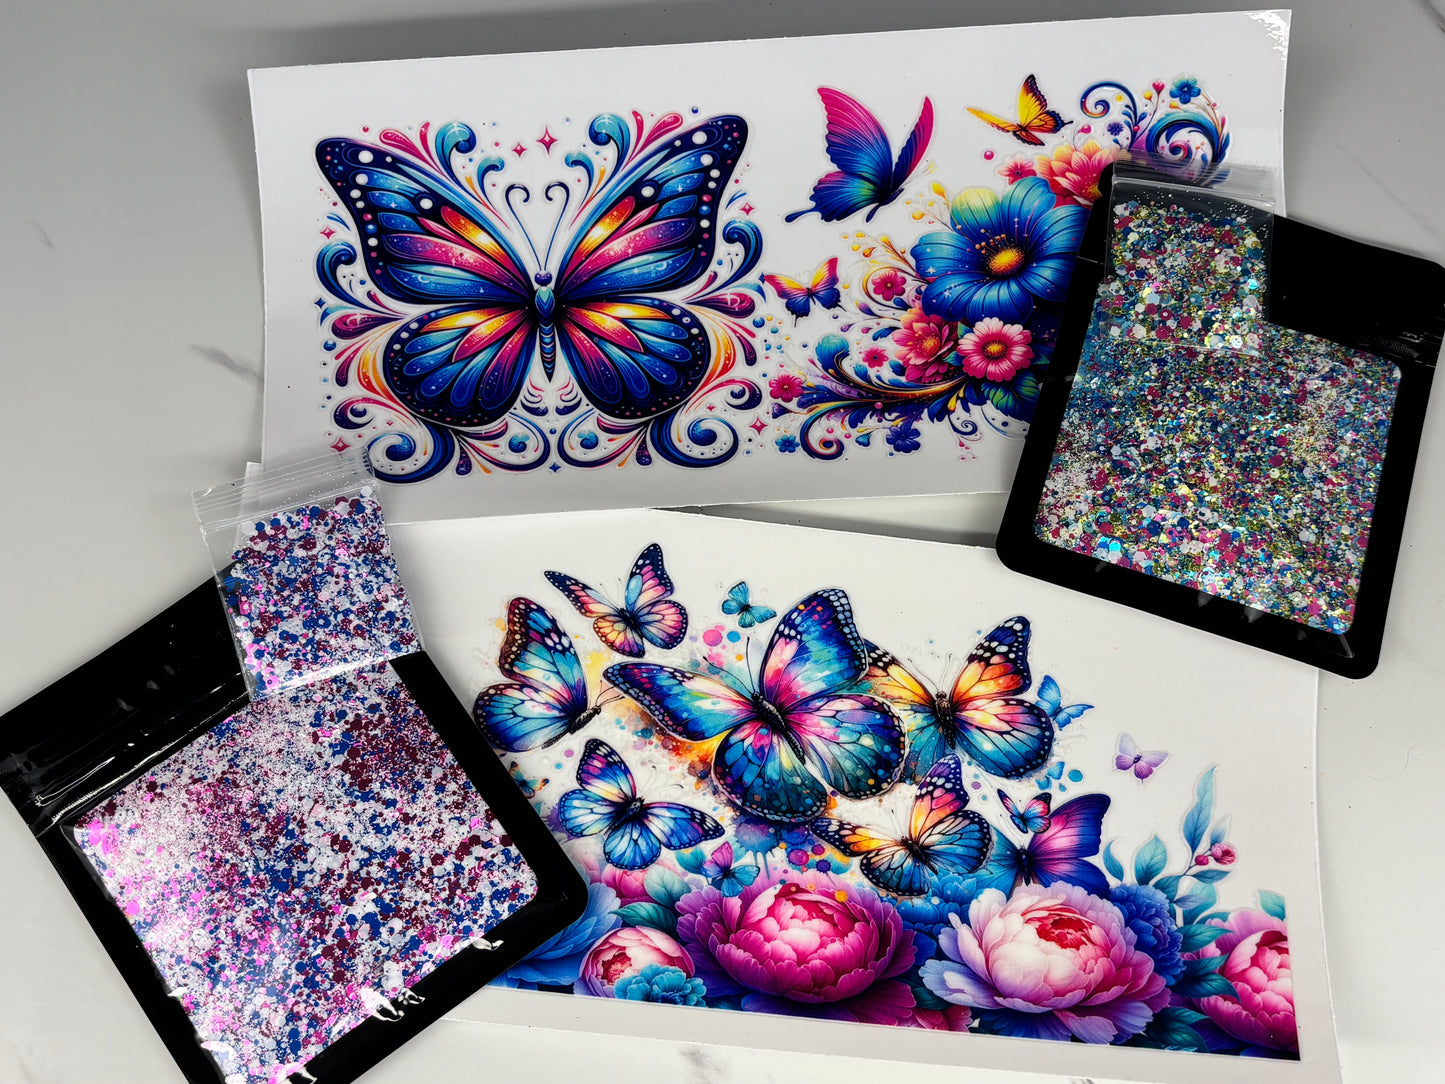
Each kit includes
2 16oz Acrylic can-style snow globe cups with lid and straw. (Some cups have a clear lid, and some will have a colored lid; the picture shows which cup it comes with.
2 UV DTFs
2 bags of custom-mixed glitter for the cups
2 bags of custom-mixed glitter for the lids
2 bottles slow/suspended solution (or lava solution)
1 bottle uv resin
1 Curved tip syringe (lava kits come with 2)
1 squeeze bottle
1 Cup cradle
1 Squeegee
1 Large mixing cup
2 Small mixing cups
1 Silicone stir stick
1 Silicone mixing spoon
4 alcohol pads
1 small plastic funnel
1 uv flash light (batteries are not included, requires three AAA batteries)
These kits are designed to be beginner-friendly with a basic glitter lid.
To decorate the lid, start by removing the silicone straw piece. Add small amounts of glitter from the small bag with UV resin and mix together. Add small amounts at a time, you can always add more. Carefully add the glittered resin to the top of the lid, avoiding the straw hole. When you have an even layer cure thoroughly with the UV flashlight from top and bottom. Thin layers will cure faster.
I have included a mixing cup and stirring spoon for a glitter pour. This is something that is not for everyone and does take practice. If you prefer, to add glitter and solution separately to the cup. Start by adding around 1 inch of solution to the cup then add some glitter and mix together, repeating the process in layers until the cup is full.
Using a squeeze bottle, fill the cup as much as possible. To remove the rest of the air bubble, use the curved tip syringe. You will be creating a vacuum. Overfill the bottom of the cup, Stick the needle into the air bubble and slowly pull back on the plunger, pulling out nothing but air while sucking in solution. If a larger bubble is created, you need to add more solution to the bottom of the cup because you’re sucking in dry air, not solution. This is a slower process. It takes practice and time. You should leave a pea sized air bubble in the cup.
UV DTFs are permanent. Once placed, they cannot be lifted. It is recommended to remove a small strip of the backing from one end. Keeping that end away from the cup, place the middle of the UVDTF ( With backing still on) on the middle of the cup to center the design. When you’re happy with the placement, press down the sticky end. Using the squeegee and the cup cradle, slowly peel back while pressing the UVDTF to the cup, smoothing back-and-forth with the squeegee using slow motions to avoid trapped air. Smooth over the entire design, focusing on small areas with the squeegee and or fingers. Then slowly peel away the top layer, making sure the sticker has adhered to the cup. If there are any air bubbles, use a sharp pen to poke a tiny hole to release the air, smoothing over the area with the squeegee.
Snow globe cup and lids are hand wash only. Never soak. Not dishwasher or microwave safe. Not suitable for hot liquids. Avoid extreme heat and prolonged sunlight.
I have sealed the rims of the cups to help avoid leaking. Cups should only be used with lid and straw.
*Please note, I do not make the acrylic cups. I purchase them in bulk from a manufacturer. Seller is not responsible if the cup cracks or breaks after it is received.
Seller is not responsible for misplaced UV DTFs.
Share